Using the Hasselblad 503cw at two car shows over a long weekend

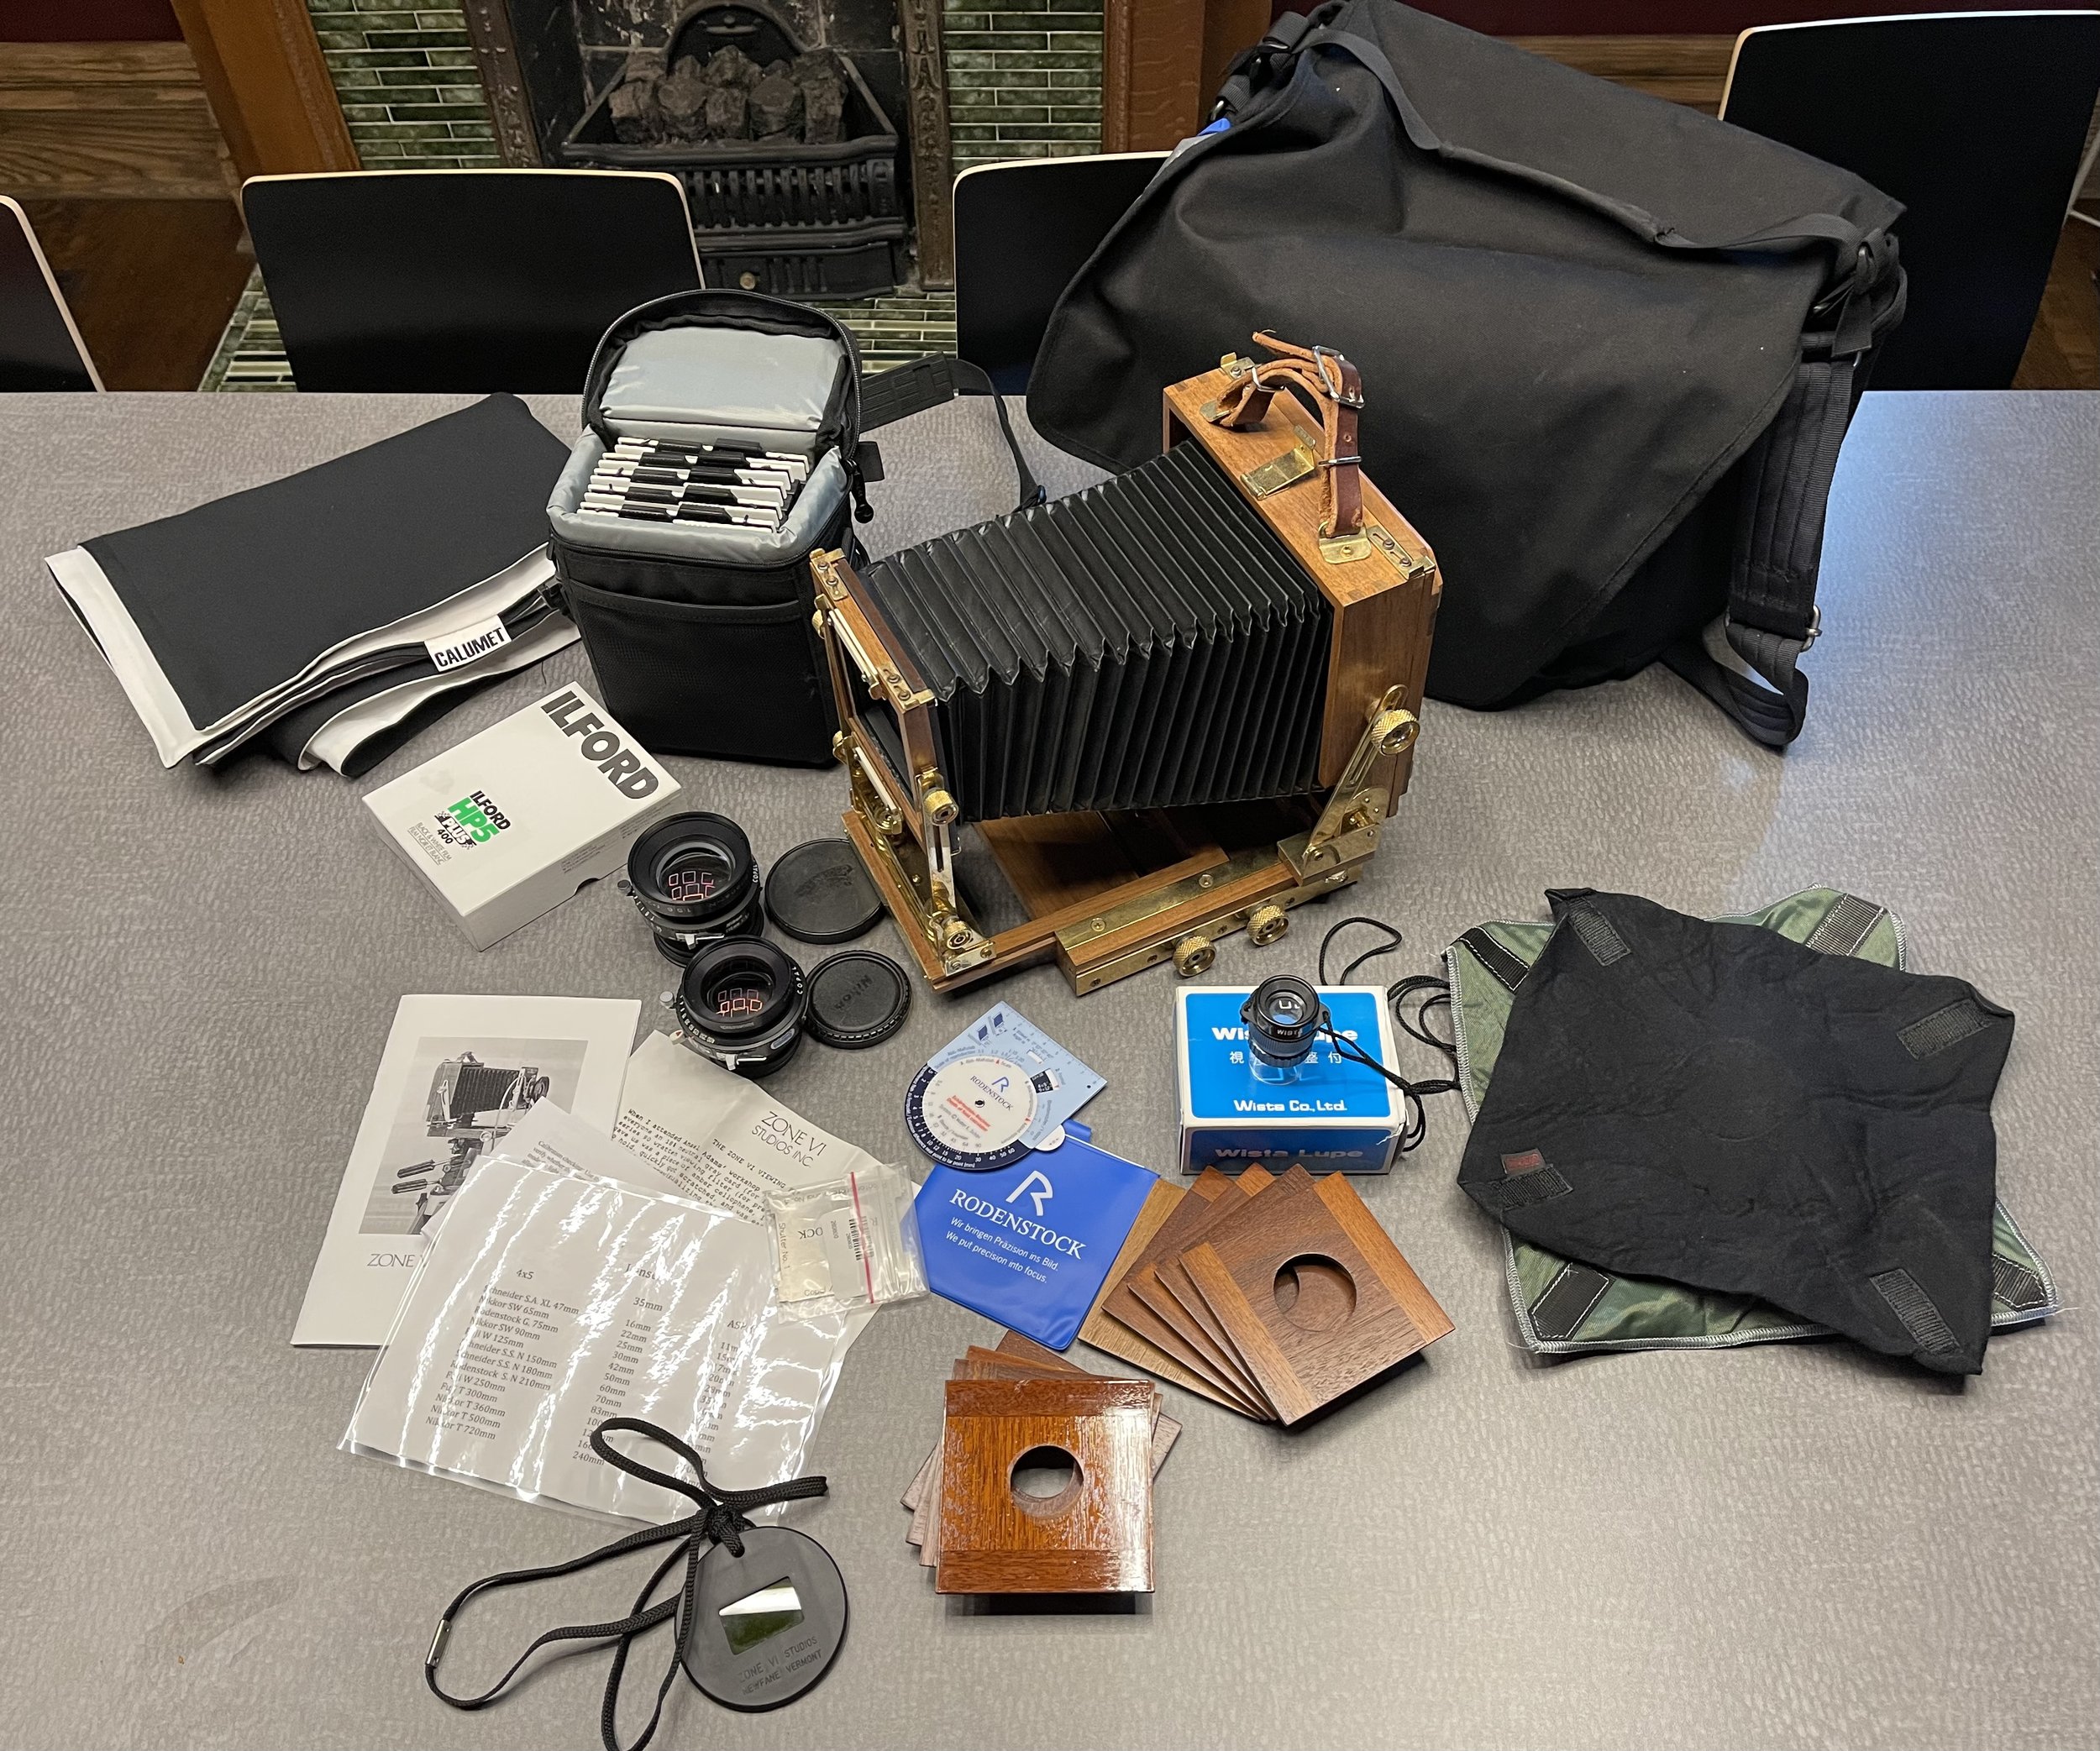
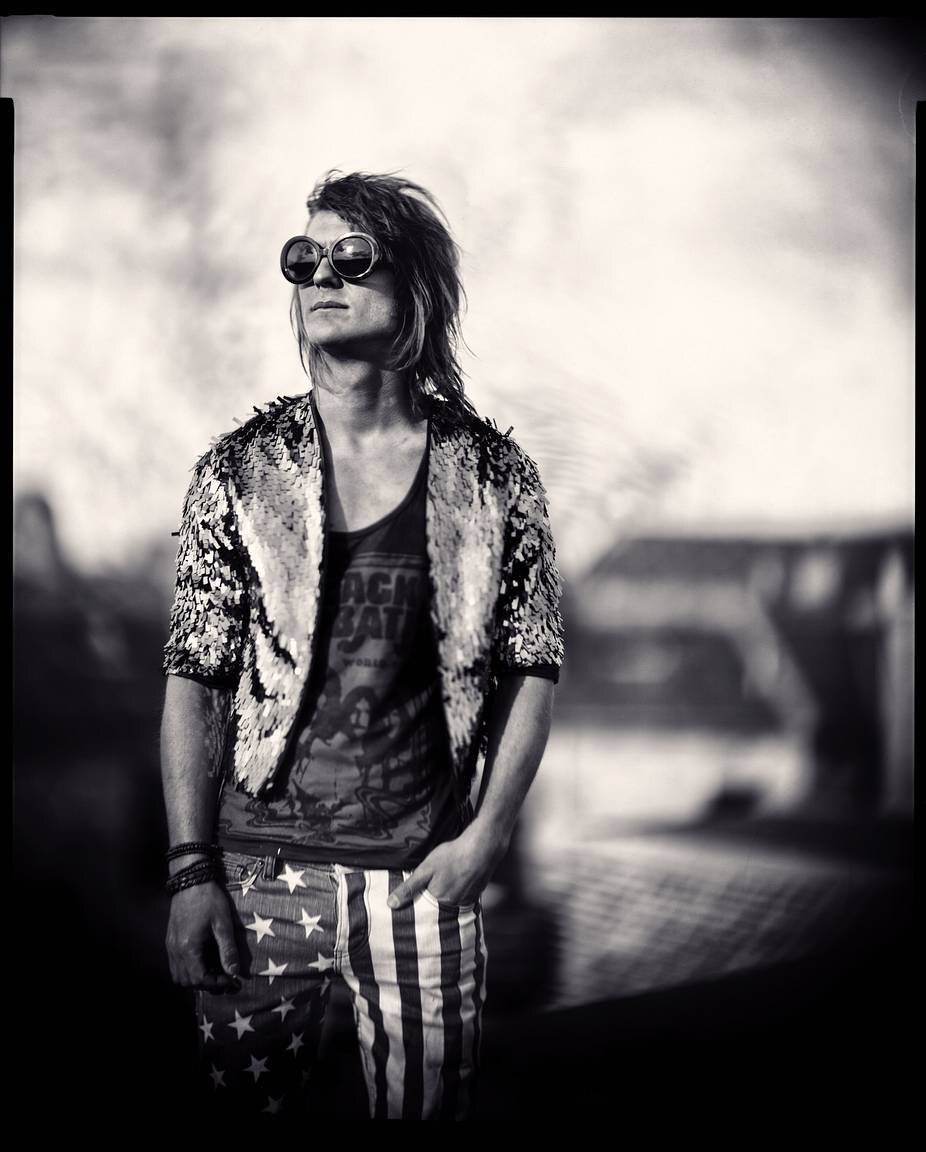
A few weeks ago I had a long weekend in the UK. I had been invited by a Timothy Everest at Grey Flannel to attend the Concourse of Elegance at Hampton Court Palace on the Friday. It wonderful event, with many amazing cars. I took my Hasselblad 503cm, with my 80mm lens and a few rolls of Kodak Gold 200.

On the Sunday of their same weekend I went to a local car show near a good friend (and photographer) Matt Cooke. We went to the 4th Annual Brightlingsea Scout Group in Brightlingsea, Essex. It was a lovely little village car show, with a mixture of classic English and American vehicles, there were plus cups of tea and home made cakes like Victoria Sponge and Lemon Drizzle cake.

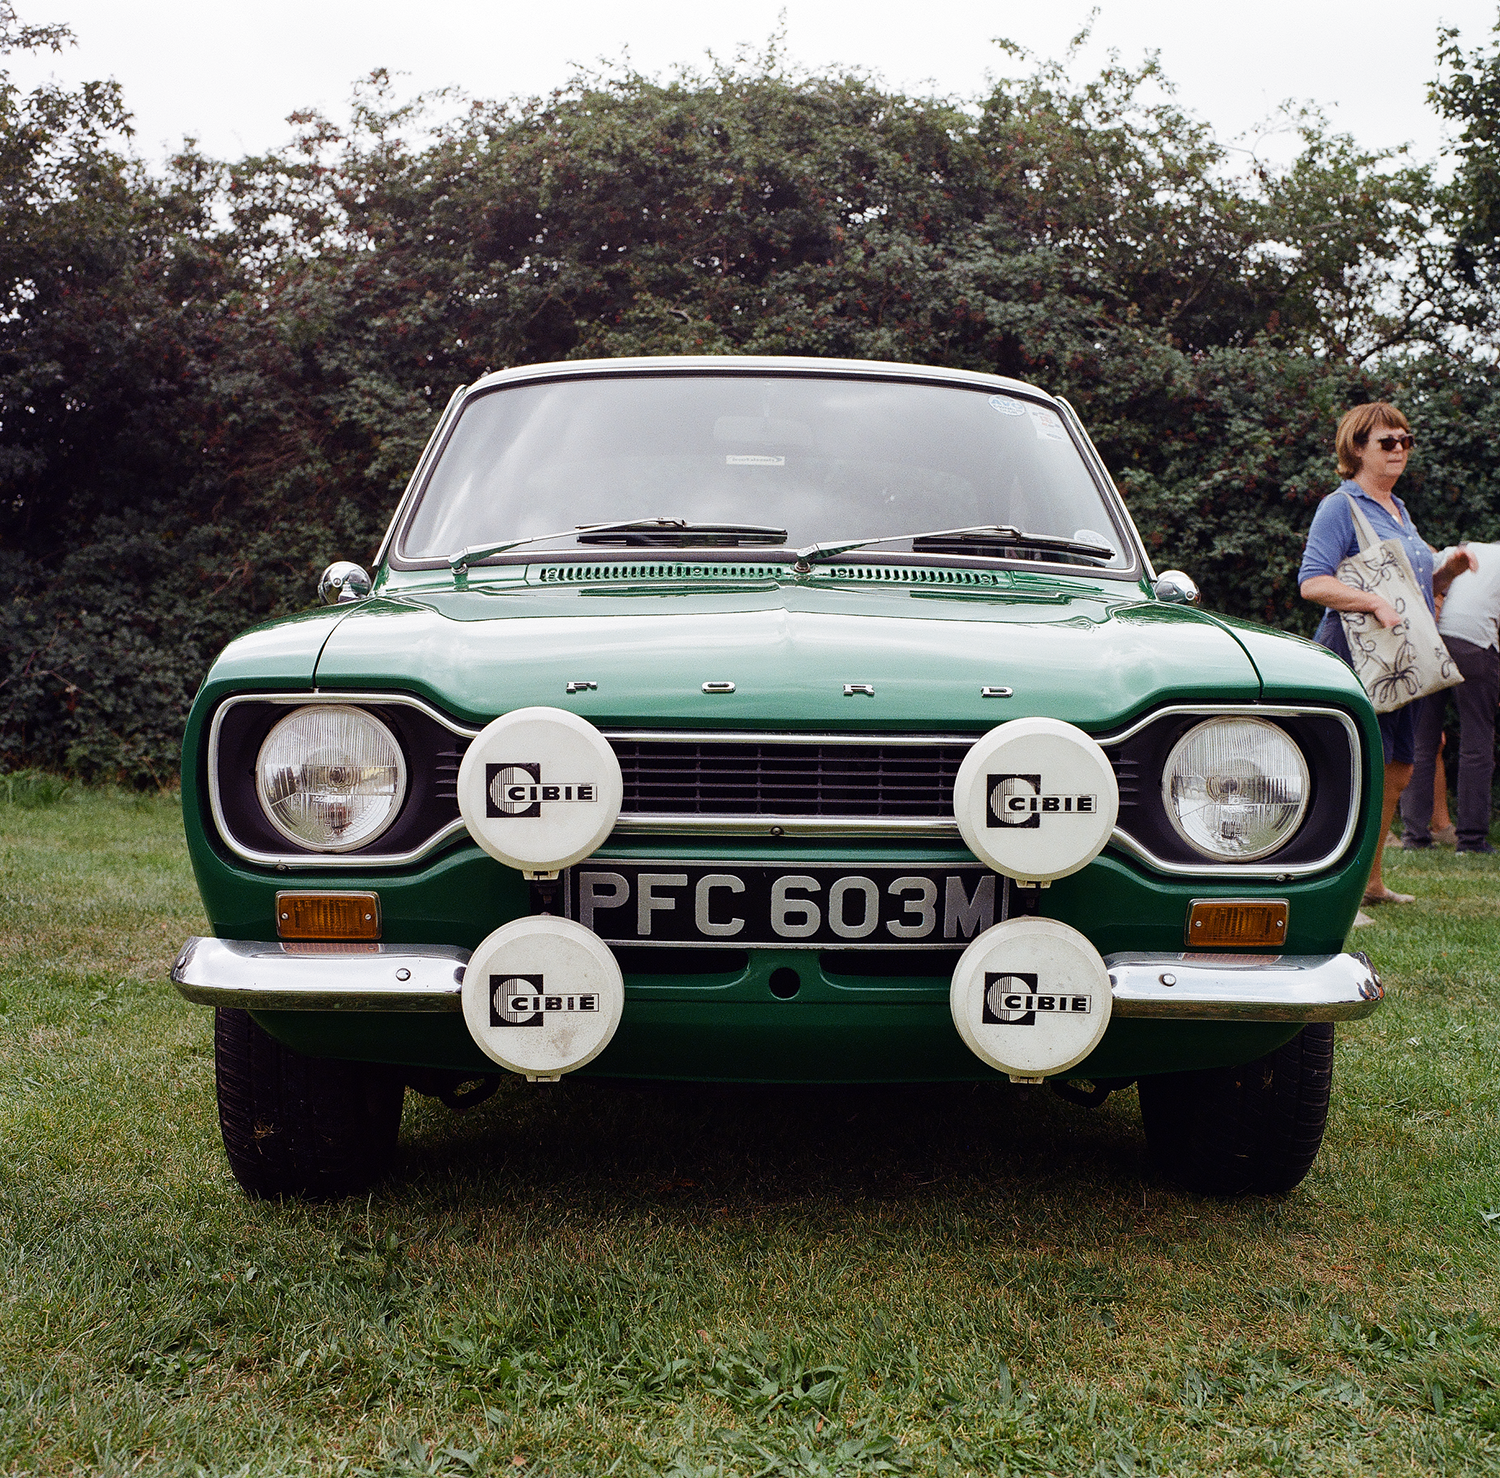
It was an enjoyable weekend with classic cars, cameras and good friends. Looking at the results I feel the Kodak Gold 200 has a lovely fine grain and a slightly muted colour palette. As it wasn’t a particularly sunny day over the weekend (just hot and humid), so maybe that is why I feel the colours are muted compared to how I remember the colours.

I took the learnings from my last video and took one camera, one lens and one film type. It made a big difference in not having too much to carry around or deciding what film to shoot. I can’t deny I didn’t wish I had wider lens for some of the shots.

Salton Sea, California with my Hasselblad 503cw

The short film is all about the various trips I’ve made to the Salton Sea area in Southern California.

The first iteration of this film had various cameras and formats…but it just didn’t feel right, so I left the editing of the film for maybe 6 months. The the more I thought about it the more I realised I needed to started again it just wan't working.

So this time I decided to only show one camera, my Hasselblad 503cw. On this trip I’m looking at four places in the Salton Sea area, they are Desert Shores, Salton Sea Beach, Salton City and Bombay Beach.

I think when look back though the photographs as I was trying to put this film together I should:
1) Use try to limit the number of cameras I take on a trip with me.
2) Use the same film stock and hopefully the results won’t differ so much.
3) Maybe take more B roll, as I only seem to remember after the event.

A big thanks to Joe Forkan for kindly letting me use his music in the video, it's all taken from his 2020 album ‘Something in the Water’ by Alpha Mule.

https://www.alphamulemusic.com/listen...

Tracks used are as follows:
- Floating Omens (instrumental)
- Moon Dogs (midnight mix)
- Blue Sky Blues (organ)
- Something in the Water (rabbit hole variation)
- Who Are You (Tom Waits)

Mamiya RZ67 Pro IID in Columbus, Ohio

It's been a while since I last created a little film, I think have been over thinking them and really wasn't happy with the content.
I have started to simplify those projects, but for now I wanted to share a few photos from a recent trip to Columbus, Ohio. I was over there to see some friends, and walked around their neighbourhood taking a few photos with my Mamiya RZ67 and shot a little GoPro footage too.

Zone VI 4x5 camera

I have just picked up a Zone VI 4x5 camera, I found it on one of the Facebook group pages. The price was right and I thought I would take the leap into 4x5 film. I’ve dabbled in it before when I borrowed a Linhof 4x5 or in fact my Travel Wide camera. But this will be the first one I have owned.

It has Rodenstock Sironar-N 1:56 f =180 and 210 lenses. A Wista Lupe, several wooden lens holders, a bag for 5 film holders, a dark cloth for the back of the camera and what looks like a shade for the back glass…it also came with a 100 sheet box of expired ilford HP5 400 (2019)…and the huge ThinkTank bag.

I know need to read the instructions, rather than do what I normally do and jump straight in and use it and then make mistakes and have to go back to the instructions anyway.

Is Instagram dead?

Currently Instagram has so many ads, sponsored links, videos and posts that the algorithm thinks you would like, this is almost every other post you see. It’s just not the same photographer friendly app it used to be, where you could browse and discover to photographers. There are many articles on the subject of “Is Instagram dead”.
So what is next, some suggest Twitter is a good place for photographers…but did you know about two new website and soon to be apps have launched just for the film community. At the moment Grainery is limited to 18 images and then you have to have a subscription to post more ($3 a month) and Newgrain is limited to 12 photos for the time being.

Check them out: https://grainery.app/ and https://newgrain.app/

Mamiya Universal Press

I have owned this Mamiya Universal Press camera for a few years, but not used it that much as the range find focus was slightly off. But recently my friend Stan took the camera apart and gave it a good service and clean, so now the focus is perfect.
I have a few medium format cameras but in this film I wanted to talk a little bit about the instant backs and how the differences in terms of exposure area on the instant films, with a few of the medium format cameras that I own.
I took the camera out around Reffen in Copenhagen, Denmark for the day. Using both the 6x9 film back and the Polaroid back with the expired FujiFilm FP-3000B black and white instant film.

Stan's Instagram page: https://www.instagram.com/stan_gdovin/

What could possibly go wrong...?

Do you ever have those days when everything is against you. From thinking you have one type of film in your camera but you have something completely different, or from finishing a roll of film to discover you have a fat film with possible light leaks.
At least I got some exercise and walked about 8 miles or 13.5 km.

I used my FujiFilm GA645w and my Mamiya 7ii with a couple of rolls of Kodak Portra 160,

The Power of One Challenge

I thought I would revisit something I did with Gary a few years ago, we called it The POWER OF ONE. You choose one camera and one film to use for one month. So in December on a little holiday and road trip in the US, I mainly used my Contax 645 and Kodak Portra 160. The films will be developed in the next week and I can then share the results. Anyone up for a similar challenge in January? Let me know and I’ll set the challenge. #thepowerofone #thepowerofonechallenge

Using my Travelwide 4x5 camera

I thought I would try something different over the weekend. I dusted off my Travelwide 4x5 camera from Wanderlust. It was a Kickstarter project a few years ago.
On top of the camera I have my trusty Voigtlander VC Light meter, an older Leica 28mm viewfinder and a Russian BLIK range finder/ viewfinder, which work so much better than trying to guess the distance you need to focus on. I used a Schneider 90 mm f/6.8 Angulon lens.

I shot 12 sheets of Rollei RPX 400, and will have them developed, scanned and hopefully will be able to post here in a few weeks.

Mamiya Universal Press, a Polaroid back and expired Fuji FP3000B

I took this instant film photo of two friends Rob and Seán with my old Mamiya Universal Press camera fitted with a Polaroid back. The second image is another friend Natalia, we did a little double image test.
I have a few pack of expired film left but I wish Fuji would reintroduced their black & white FP 3000B and colour FP 100C films again…such good fun with instant film on these older cameras.

Where it all Started

On Roads & Cameras (OR&C) was an initiative we literally started on our road trip. As we drove west in our Challenger we asked ourselves the question, what will we do with all the photographs we’ll take along the way? OR&C was the answer to that question. Today OR&C is a website, Instagram, YouTube and Facebook page, and the desire for two Brits to share their love of cameras, cars, and the open road with other like-minded people. In the future, we see it as being more, but for now, we thought it would be good to briefly revisit the road trip that kicked it all off.

Peter and Gary outside Shiller’s Photographic on Old Route 66 in Saint Louis MO., (April 2015).

Peter and Gary outside Shiller’s Photographic on Old Route 66 in Saint Louis MO., (April 2015).

Day One: Leaving Saint Louis with a stop off at Schiller’s along the way

The road trip officially started outside Schiller’s; a local camera store in Saint Louis located on Old Route 66.  We stocked up on film, camera gear, and even a new wide-angle lens to photograph the Grand Canyon and started out on our new adventure. The car we chose to use was a 2015 Dodge Challenger all-wheel drive, which we hired from Enterprise. Enterprise worked really hard with us, trying to find the exact car we wanted, and really made the trip a success from the car perspective.

The Challenger on the side of the road on one of our stop off moments.  Taken using a Hasselblad 500CM.

The Challenger on the side of the road on one of our stop off moments. Taken using a Hasselblad 500CM.

We left Schiller’s and headed west along Route 66 until we had to pick up highway 70 west toward Kansas City.  Along the way, we stopped off at a Western store and for some unknown reason I decided to buy a pair of cowboy boots and Peter bought some Western shirts and a John Deer baseball cap. We wore those for most of the trip, Peter’s cap was bright green and my boots were surprisingly comfortable.

Larry’s Boots

Larry’s Boots

Peter in his new John Deere baseball cap, (2015).

Peter in his new John Deere baseball cap, (2015).

The drive after that was a baron and not much to see. Due to setting off late in the afternoon we only made it to Kansas City, where we booked into a roadside hotel and got some rest. There were some big storms rolling through and it had rained for most of the day. We hoped that the next day would provide some better experiences and things to photograph.

Day Two: Kansas City to Boulder, CO

We headed out early after grabbing some breakfast and a cup of tea. We started out again on a major highway leaving Kansas City and heading toward Boulder CO. We quickly got bored of the highway and decided to take some of the back roads. Taking the back roads is always more fun and always provides better content and things to photograph, this time was no exception as we stumbled across a small town called Park. In Park, we refuelled at an old service station called Park Oil Co., where we met Shirley.
Shirley invited us in and let us look around and take photos, she also loved photography and shared some of her work with us.  She loved capturing a lot of the nature that surrounded her and had a lot of it up in the gas station for people to see. We spent almost two hours there talking with Shirley and photographing the inside and outside of the Park Oil Co gas station and store.

Park Oil Co. Just west of Kansas. Photograph taken using a Hasselblad 500 CM on Portra 400

Park Oil Co. Just west of Kansas. Photograph taken using a Hasselblad 500 CM on Portra 400

Shirley, the owner of Park Oil.

Shirley, the owner of Park Oil.

Meeting the people who live along these highways and make a living from them was the most memorable and special part of the trip. It really lets you see the real America and meet the great people along the way.  Meeting these people really made the trip memorable and in many ways, they were more memorable than some of the sights along the way, they became the red thread that stitched the sights together and gave them meaning. We left Park and Shirley and headed toward Boulder, CO.

Inside Park Oil Co.

Inside Park Oil Co.

Our Challenger parked outside of Park Oil. Taken using a Canon 6D with 50mm f1.2 L Series lens.

Our Challenger parked outside of Park Oil. Taken using a Canon 6D with 50mm f1.2 L Series lens.

Leaving Park, Kansas and heading west toward Boulder CO.

Leaving Park, Kansas and heading west toward Boulder CO.

Many of the highways and countryside so far were very baron with not much to see apart from grassland and long stretches of highway accented with telegraph poles. However, to a photographer, there is a certain kind of beauty to that baroness. We drove through this landscape for the best part of eight hours and finally arrived late in Boulder, CO., which was our next portion of the trip. Boulder seemed to be a little bit of a bubble; there were a lot of rich people there that looked like they had been transplanted from New York or California and did not seem to belong. Many of them were young entrepreneurs looking to get rich by starting up small businesses and trying to escape the hum and the drum of their previous big cities. The contrast between Boulder and other parts along the way such as Park was strong and it felt odd, making you question what a “Real America” is today. We found a great B&B called the Bradley Boulder Inn, and dropped off our gear, and headed out to grab some dinner. By the time we got to eat it was late, driving for eight hours takes its toll and we were both tired. We sat, ate our dinner and discussed the things we had seen along the way, and shared a few of our photographs too. This is where we started talking about building the website for OR&C and when we got back to the B&B we started exploring how to build it via Squarespace.

The next morning at breakfast we sat at one of the large wooden tables, and laid out one of our maps to look at the route we’d take. Much of our road trip was “on-the-fly” and we’d make up the route in the morning, head out in the Challenger and drive it, and photograph the people and places along the way. We’d also book hotels as we go and look them up online and book on the road. There was a lovely feeling about not knowing really where you were heading and just being able to drive off into the horizon. While you are on the road driving like this it’s like time stands still and you are cheating time. The mental freedom it provided was tremendous and the ability to let go of the day-to-day work burden and just be free for a while was wonderful.  If you have never taken a road trip I highly recommend it, it’s food for the soul and really allows you to think about the important things and leave the trivial stuff in your rearview mirror.

South Park Highway heading into CO., (2015).

South Park Highway heading into CO., (2015).

Watch out for the next post where we will write more about days three and four, Boulder to Santa Fe and Santa Fe to Flagstaff. Thanks for reading and following OR&C, hopefully, Peter and I will get to take another road trip once all the COVID-19 restrictions lift and things open up again. Watch out for other posts too as we share other guest blogs and posts on the new cameras we are trying and cars we are renovating.

Gary

Double Exposure

A year or so ago I bought a Frankin Instax back for my Mamiya RB67. I found it via the Camera Film Photo website. Yes it’s expensive, but very well made and easy to use. The camera is modified in Hong Kong by specialist "Tom Chung" rather than CFP. In recent year several other people have done something similar but a lot cheaper, I can only comment on my one as I’ve not tried the other versions of this custom hack.
So I went out on Sat and shot a couple of ‘normal’ test instant images, but then started to have a little fun with double exposures. I’m pretty happy with my initial experiment.

Hope you all had a good Easter and were able to get out and take a few photos too. Thanks taking the time to check out the website and reading the small posts, hope you enjoyed them…
Cheers
Peter

Rolleiflex 3.5f

The other weekend I took a trip to Køge and Køge Nord Station, Denmark. Built in 2019 it has an amazing pedestrian bridge that spans not only across the railway tracks but a busy motorway too. It was a bitterly cold day but blue skies and sunny. I shot a roll of Fuji Acros 100 and Kodak Tmax 100 film on my old Rollieflex 3.5f. Spent the day with @xonboy and @stan_gdovin, thanks to Stan for developing and scanning the films.

Hasselblad 503cw and the GoPro 9 Black

I spent the other Sunday in the fishing town of Gilleleje, in Denmark. I had a roll of Ilford FP4 Plus 125 already loaded in my Hasselblad 503cw, so I shot these photos before adding the GoPro and changing to Portra 160 for the rest of the day. Thanks to @stan_gdovin for developing and scanning my roll of b/w film and for an enjoyable way to spend a Sunday. Once the Port has been developed and scanned I try and show the images with footage from the GoPro too.

Zeiss Super Ikonta 531/2

I picked up a Zeiss Super Ikonta 531/2 at a flea market for $15. I loaded it with film and to my surprise it worked perfectly. It takes 8 images size 6x9 cm on 120 film. With an inlay mask it is possible to take 16 images size 4.5x6 cm on same rollfilm.
Lots of fun...

LOMOGRAPHY ARTICLE ON BJARKE FROM ONE OF MANY CAMERAS, COPENHAGEN

A few years ago I moved over to Copenhagen for work, one of the first thing I did was to walk around the city and visit as many of the camera stores (that sold film) as I could. The first place visited ‘One of Many Cameras’ has become a regular haunt for me, not only to buy film, have it developed and sometimes buy a camera or two…but to chat over a cold beer with Bjarke Ahlstrand.

As you will read in the Lomography article, he not only has a camera store that he started with his best friend, but owns a rock bar with a few friends called ‘Zepplins’ and a metal label called ‘Mighty Music’.
If your ever in Copenhagen, drop by and say hello to the OOMC guys…Bjarke, Andreas, Anton, Mikkel, Jesper or Henrik.

Have a read of the article on the Lomography website:
https://www.lomography.com/magazine/345119-one-of-many-cameras-interview-with-bjarke-ahlstrand-and-his-many-faces

Thanks for visiting the website, please hit the like button on anything you like. You can also see some of of work on our Instagram page.
Please feel free to drop us a message with any questions you might have.

THE HASSELBLAD X1D REVIEW

The first question that makes the most sense when reviewing the Hasselblad X1D is why? Why did I decide to purchase it? Why did I decide to save up and spend nearly $5000 (that’s the price for a good condition used one on eBay) on a camera and lens? As most of you know who are reading this buying a camera is just as much about the irrational mind as it is the rational mind. To answer the why in more detail I want to break it down to the following factors:
1. Brand obviously features highly and already owning a Hasselblad prior to purchasing the X1D was a heavy influencing factor.
2. Next is the design of the camera, or the three F’s as I refer to it; form, function and feel.
3. And finally, other aspects of the camera. One of which I always look for is quality.
Let’s look at these three factors in a little more detail and let me explain more about why it is worth buying this camera.

IMG_1394.jpg

1. Brand
When it comes to camera brands there are many out there, but not that many as iconic as Hasselblad. Victor Hasselblad truly created a thing of beauty and magnificence when he created the Hasselblad company. Not only is it an icon for photographers the world over, but it is also a promise of quality and precision. These cameras and the Hasselblad brand is a promise of excellence and quality that will last well beyond the owner of the camera. I purchased my Hasselblad 500CM secondhand and it operates just as beautifully now, as it did when it was made back in the ’70s. How many products can you say that about today? The Hasselblad brand is much more than this though, it delivers value, not just the value you get from other products on the market today, but the meaningful value that keeps delivering as long as you own the camera. Over time this ongoing value turns into trust and it is this trust that makes the Hasselblad brand what it is today, and also what inspired NASA to use it as their camera of choice for their Luna expeditions and the first man on the moon.

2. Design
Next, let’s talk about design. For most people design is how something looks aesthetically and there is no question that Hasselblad scores highly in this department. But as designer and behavioural psychologist, design to me is so much more. Design to me is more about how something functions, the thought that goes into the user experience and how it makes you feel; not just aesthetically, but from a deeper level of satisfaction. Design is about predicting the things you as a human will do with the camera and then making sure the camera knows this and delivers on them and supports you in those tasks versus trying to dictate certain ways of using the camera and forcing you into unnatural behaviours.

Form
The Hasselblad X1D’s form is beautiful, visually it is stunning, yet there is an intelligence to its form that transcends aesthetics. An intelligence that speaks to you silently and intuitively; in the industry, we call this design language. Before you even hold it, you already know how to operate it, its form is almost an extension of our hands and it intuitively fits and becomes part of who we are when we are taking photographs.

Every aspect of its form has been considered from the attention to detail found in the chamfers that eliminate all the sharp edges, right down to the placement of the controls in such a way that allows them to be placed exactly where they need to be. The contrast and choice of materials also signify quality and clearly communicates its sophistication and status as an industry leader. The choice of materials is interesting and again speak about the intelligence of the aesthetic as well as its function, which I will discuss later. The body is machined from a solid block of aluminium and each camera is hand made in Sweden, with all the love and attention you’d expect from Swedish design. Hasselblad did make a departure from the original leatherette found on the earlier Hasselblad models like the 500CM. Instead of the leatherette material is uses some form of a thermoplastic elastomer or silicone material. On the surface and initially, I don’t mind this but when I think about the point I made about the longevity and quality of the Hasselblad brand I wonder how well this will fair. I only say that as on some of my older cameras the rubber grips have started to deteriorate over time and in some cases even become sticky to the touch, which renders them useless. I sincerely hope this is not the case here, but I suppose only time will tell if the Hasselblad promise will stay true.

IMG_1395.jpg

Functionality
Let’s continue now to talk a little about the function of this camera. I have owned mine now for nearly six months and wanted to wait until I have had a chance to use it before writing this review so as to truly be objective and as equitable as I could be. The first functional component is the buttons. There are a total of 13 buttons and three dials on the camera, which already speaks to the minimalist nature and good design found in this camera. The shutter button is perhaps the most prominent, highlighted in its powder-coated burnt orange colour. From a functional perspective, the shutter button at first takes a little getting used to as the half-pressing and full pressing as not like other cameras, which does sometimes leave you having to pay more attention to that functionality than it does the photograph. However, once you become accustomed to its idiosyncratic nature. Next, let’s discuss the front scroll wheel. This has been designed in such a way that it sits flush to the surface of the body so as not to get accidentally nudged into an incorrect position. To operate it you push it down once and it pops up, allowing you to rotate it to the desired setting and then push it back down to lock it in place. This may not seem like a big deal, but I say that from experience I have found that many of my other cameras can accidentally get nudged into an incorrect mode and this can cause issues. The power button is also on the top of the camera and is easy to use, though the camera does take its time to turn on. The majority of the other buttons are the LCD display buttons or the DOP and lens release buttons. They all work well and all have lovely chamfers and attention to detail that reaffirms Hasselblad’s commitment to quality.

The other two dials are used for the aperture and shutter controls, and are again, placed where you’d expect them to be in reach of your thumb and index finger. It did, however, take me some time to realise they work best when you use the mid-section of your thumb and index finger versus your tips as this eliminates the need to bend them and then have to reposition your grip. For someone with smaller hands than me, the experience may be different so please bear this in mind.

IMG_1399.jpg

The viewfinder is brilliant literally and metaphorically. It is well illuminated and allows you to view the image after you have taken your photograph without having to remove your eyes to look at the LCD display, which does help save battery life. Unlike the Hasselblad 500CM, the lens controls are now to be found in the viewfinder. So, you can set the f-stop and aperture within this environment and adjust on the fly as you frame your shot.  It has a built-in light meter too, which makes exposure control great and again, this can be found within the viewfinder. Also, if you wear glasses like me, you’ll be pleased to know it has a built-in diopter too, allowing you to adjust the viewfinder focusing functionality.

IMG_1396.jpg

The LCD display is intuitive, bright and big. It is very self-explanatory, and I won’t go into too much detail about it. It works and the font is larger enough for someone with poor vision like me to see in bright sunlight. Oh, and it is touch screen too, though it is not quite up to the standards of the iPhone functionality, it does work and is relatively reliable. I have found at times though like most things on the camera there is a little learning curve.

Feel
Finally, let’s talk about how it feels. The camera is light, being constructed from aluminium it is very light, yet very strong. It feels beautifully engineered and like a thing of quality. The weight is just right, and the balance is perfect. It does come with a standard strap, but I would recommend buying a better one as it is a little skinny for my liking and a nice wide leather one like the 4V straps or a webbing one from Peak Design would be much better. I opted to go for a 45mm lens, and its construction is also beautiful. The only thing you need to operate, if you choose to is the manual focus, which will save battery life but slow down your photography.

The grip feels good and does provide a feeling of confidence when you hold it; mostly due to the rubberized material use in the design. The aluminium feels cold, which is nice on summer days, but not sure how that will play out in colder climates. I have not tried operating the camera with gloves, but due to its simplicity feel that it will be much better than my Leica’s.

3. Other aspects of the camera
While we are talking about slowing down, I do want to point out that this camera will slow your photography down. Not in a bad way, but in a purposeful way. I don’t tend to shoot fast-action photography and I do take my time to think about what I want to shoot and will go back several times before I get the final shot right.
If you shoot fast action subjects or street and moving things, this camera is not for you and I would suggest you look elsewhere. It is also a camera with lots of personality; you really have to get to know it first before it starts to give up its magic.
Battery life is not great too, you’ll need to buy three batteries and have them on a full charge. So if you are working remotely, make sure you take power backups. The batteries are well designed though and the need for a heavy transformer/charge has been eliminated and all you need is a small cord that plugs directly into the battery. This does cut down on the weight and helps the environment too, which is another great feature.

B0000149 CROPPED.JPG

The camera takes two memory cards, and this is good too, as each photograph can be in the region of 50mb. The camera is equipped with a cropped 645, 50MP sensor that delivers extremely detailed shots and allows you to crop and zoom a lot. The image quality is beautiful and the colours are very natural and if you are someone like me who does not like to mess around in Photoshop, all you need to do is adjust the brightness, contrast and perhaps sharpen tool and you are good to go.

In Summary
I could go on and talk much more about other aspects, but I won’t, as I am sure you may have read them somewhere else. I did buy mine second hand, which to me makes more sense than splashing out on a new one. Obviously the X1D mkII is out now, which is why the price of the X1D dropped to a point that I could afford one. If you have some cash to invest and want probably the best medium format digital camera out there, then take the leap. Remember, this camera is built to last, and I think will be something you enjoy for a long time. Over the last six months, I have really enjoyed getting to know it and it has made me a better photographer by slowing me down. At first, I was worried because I thought I would be snap happy and shoot all sorts of rubbish in the pursuit of the one great shot, but I have not, and that is because the X1D makes you stop and think more. The following are just a few of the shots I have taken with it. I chose them as they show a range of different types and they are really shots taken in experimental phases to test subjects and scenarios. I do plan on starting a project soon with this camera so I will post a follow up for you all to see. Thanks for following On Roads & Cameras and I hope this post was of some help to those thinking about taking the leap, as well as those who already did.

Thanks for reading and perhaps we’ll see you on the road somewhere soon…
Gary

MAMIYA RZ67 PRO llD & 3 ROLLS OF EXPIRED FILM

A few weeks ago I took the RB67 around Copenhagen Meat Packing District. It thought it might be interesting to do a test of 3 types of film on the same subjects. It ended up being more difficult than I thought to keep track of which shots I'd taken as I was trying to film and taken shots with my phone at the same time.

I had three different film back (645/120/220) with expired film. I used the following:
- 645 back with Kodak Portra 160 (expired in 2014), 6 years out of date
- 120 back with Fuji RVP 100 (expired in 2002), 18 years out of date
- 645 back with Ilford Delta 100 (expired in 2017), 3 years out of date

I shot the Kodak 160 at 100, the Fuji 100 at 50 and the Ilford 100 at 100. I scanned the film with my Microtek ArtixScan F2, but the lab rolls the film so tightly, it's difficult for the film to stay flat in the scanner tray. Plus no matter how clean and dust free I try to keep the negs, they were a magnet for dust. So I might get them all rescanned professionally. Anyway this is a first attempt at putting something like this together...hope you like them. Next time I don’t think I’ll have as many shutter sounds effects as it’s a little distracting.

Here are a couple of still images in the video, given the fact all the films were expired I was pleasantly surprised they actually came out looking half decent (some better than others)…it’s always a gamble with out of date film.

Thanks for reading and liking the blog…any questions, please feel free to drop a message.

Peter